 Materials needed:
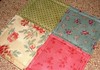
 1-Cut out fabric as instructed on pattern pieces
 2- layer Bottom Overlay and fusible interfacing; right side of fabric with smooth side of interfacing.(.or glue side up.) Stitch across the top at 1/4 inch. Clip curves and turn to right side.
 3- finger press, then iron, across the very top. Then iron the whold piece. Do this with both overlays.
  5-Line up the overlay with bottom of main piece. Topstitch at 1/8" and then again at 1/4"
  6- With main pieces, right sides together, sew side and bottom seams at 1/4"
 7-Line up side and bottom seam. Sew across at 1/4" to form corner..or flat bottom for purse.
 8- Fuse interfacing to one of the pocket pieces. With right sides together, sew 3 sides at 1/4" seam allowance. Clip the 2 corners and turn right side out.
 9- Press raw edges under 1/4". Edge stitch pocket closed.
10- Attach pocket to right side of one lining piece.
11-With right sides of lining pieces together, sew side seams, bottom seam, then corner seams.

12- Turn right side out, and press side seams of lining, and of main bag body.

13- Now it's time to make the handles. Take the handle pieces, fold in half and press. Open, then fold sides in to center fold line, and press.
14-fold in half and press again.

15- Top stitch handles at 1/8th and 1/4 inches. Press flat.

16-pin handles in the center of the handle spaces on main fabric. Set main body aside for a minute.
17- Attach magnetic snap to lining.

18-Put main purse into lining--right sides together. Match side seams and pin in place.
 19-Sew around the top at 1/4" leaving an opening, about 3", for turning right sides out.
21-Fold the spece you left open undre 1/4". Press and pin.
22-top stitch around the whole purse opening at about 1/4".

23-Press entire purse, especially the top edge.
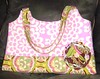
24-Embellish however you would like!! I used this flower!
25-Enjoy your new bag!


 Step six- Top stitch about 1/8" from the edge. Top stitch again at 1/4". Your coaster is finished!


